[ad_1]
This text is the following step within the collection of PyTorch on Google Cloud utilizing Vertex AI. Within the previous article, we fine-tuned a Hugging Face Transformers mannequin for a sentiment classification job utilizing PyTorch on Vertex Coaching service. On this submit, we present find out how to deploy a PyTorch mannequin on the Vertex Prediction service for serving predictions from skilled mannequin artifacts.
Now let’s stroll via the deployment of a Pytorch mannequin utilizing TorchServe as a custom container by deploying the mannequin artifacts to a Vertex Endpoint. You will discover the accompanying code for this weblog submit on the GitHub repository and the Jupyter Pocket book.
Deploying a PyTorch Mannequin on Vertex Prediction Service
Vertex Prediction service is Google Cloud’s managed mannequin serving platform. As a managed service, the platform handles infrastructure setup, upkeep, and administration. Vertex Prediction helps each CPU and GPU inferencing and provides a number of n1-standard machine shapes in Compute Engine, letting you customise the size unit to suit your necessities. Vertex Prediction service is the simplest technique to deploy your fashions to serve predictions for the next causes:
- Easy: Vertex Prediction service simplifies mannequin service with pre-built containers for prediction that requires you to solely specify the place you retailer your mannequin artifacts.
- Versatile: With custom containers, Vertex Prediction provides flexibility by decreasing the abstraction stage as a way to select whichever ML framework, mannequin server, preprocessing, and post-processing that you just want.
- Assistive: Constructed-in tooling to trace efficiency of fashions and clarify or perceive predictions.
TorchServe is the beneficial framework to deploy PyTorch fashions in manufacturing. TorchServe’s CLI makes it straightforward to deploy a PyTorch mannequin domestically or may be packaged as a container that may be scaled out by the Vertex Prediction service. The custom container functionality of Vertex Prediction gives a versatile technique to outline the surroundings the place the TorchServe mannequin server is run.
On this weblog submit, we deploy a container operating a TorchServe mannequin server on the Vertex Prediction service to serve predictions from a fine-tuned transformer mannequin from Hugging Face for the sentiment classification job. You may then ship enter requests with textual content to a Vertex Endpoint to categorise sentiment as optimistic or adverse.

Determine 1. Serving with custom containers on Vertex Prediction service
Following are the steps to deploy a PyTorch mannequin on Vertex Prediction:
- Obtain the skilled mannequin artifacts.
- Package deal the skilled mannequin artifacts together with default or custom handlers by creating an archive file utilizing the Torch Mannequin Archiver software.
- Construct a custom container (Docker) appropriate with the Vertex Prediction service to serve the mannequin utilizing TorchServe.
- Add the mannequin with the custom container picture as a Vertex Mannequin useful resource.
- Create a Vertex Endpoint and deploy the mannequin useful resource to the endpoint to serve predictions.
1. Obtain the skilled mannequin artifacts
Mannequin artifacts are created by the coaching utility code which can be required to serve predictions. TorchServe expects mannequin artifacts to be in both a saved mannequin binary (.bin) format or a traced mannequin (.pth or .pt) format. Within the earlier submit, we skilled a Hugging Face Transformer mannequin on the Vertex Coaching service and saved the mannequin as a mannequin binary (.bin) by calling the .save_model() technique after which saved the mannequin artifacts to a Cloud Storage bucket.
Based mostly on the coaching job title, you may get the situation of mannequin artifacts from Vertex Coaching utilizing the Cloud Console or gcloud ai custom-jobs describe command after which obtain the artifacts from the Cloud Storage bucket.
2. Create a custom mannequin handler to deal with prediction requests
TorchServe makes use of a base handler module to pre-process the enter earlier than being fed to the mannequin or post-process the mannequin output earlier than sending the prediction response. TorchServe gives default handlers for widespread use circumstances comparable to picture classification, object detection, segmentation and textual content classification. For the sentiment evaluation job, we’ll create a custom handler as a result of the enter textual content must be tokenized utilizing the identical tokenizer used on the coaching time to keep away from the training-serving skew.
The custom handler introduced right here does the next:
- Pre-process the enter textual content earlier than sending it to the mannequin for inference utilizing the identical Hugging Face Transformers
Tokenizer classused throughout coaching - Invoke the mannequin for inference
- Publish-process output from the mannequin earlier than sending again a response
three. Create custom container picture with TorchServe to serve predictions
When deploying a PyTorch mannequin on the Vertex Prediction service, you have to use a custom container picture that runs a HTTP server, comparable to TorchServe on this case. The custom container picture should meet the necessities to be appropriate with the Vertex Prediction service. We create a Dockerfile with TorchServe as the bottom picture that meets custom container picture necessities and performs the next steps:
- Set up dependencies required for the custom handler to course of the mannequin inference requests. For e.g.
transformersbundle within the use case. - Copy skilled mannequin artifacts to
/house/model-server/listing of the container picture. We assume mannequin artifacts can be found when the picture is constructed. Within the pocket book, we obtain the skilled mannequin artifacts from the Cloud Storage bucket saved as a part of hyperparameter tuning trials. - Add the custom handler script to
/house/model-server/listing of the container picture. - Create
/house/model-server/config.propertiesto outline the serving configuration comparable to well being verify and prediction listener ports - Run the Torch Mannequin Archiver software to create a mannequin archive file from the information copied into the picture
/house/model-server/. The mannequin archive is saved within the/house/model-server/model-store/with title identical as<model-name>.mar - Launch Torchserve HTTP server to allow serving of the mannequin referencing the configuration properties and the mannequin archive file
Let’s perceive the performance of TorchServe and Torch Mannequin Archiver instruments in these steps.
Torch Mannequin Archiver
Torchserve gives a mannequin archive utility to bundle a PyTorch mannequin for deployment and the ensuing mannequin archive file is utilized by torchserve at serving time. Following is the torch-model-archiver command added in Dockerfile to generate a mannequin archive file for the textual content classification mannequin:
-
Mannequin Binary
(--serialized-file parameter): Mannequin binary is the serialized Pytorch mannequin that may both be the saved mannequin binary (.bin) file or a traced mannequin (.pth) file generated utilizing TorchScript – Torch Simply In Time (JIT) compiler. On this instance we’ll use the saved mannequin binary generated within the earlier submit by fine-tuning a pre-trained Hugging Face Transformer mannequin. -
NOTE: JIT compiler hint might have some device-dependent operations within the output. So it’s usually a great observe to generate the hint in the identical surroundings the place the mannequin might be deployed.
-
Mannequin Handler
(--handlerparameter): Mannequin handler may be TorchServe’s default handlers or path to a python file to deal with custom TorchServe inference logic that may pre-process mannequin inputs or post-process mannequin outputs. We outlined a custom handler script within the earlier part of this submit. -
Additional information (
--extra-filesparameter): Additional information let you bundle further information referenced by the mannequin handler. For instance, just a few of the information referred within the command are: -
index_to_name.json: Within the custom handler outlined earlier, the post-processing step makes use of an index-to-name JSON file to map prediction goal indexes to human-readable labels -
config.json: Required for AutoModelForSequenceClassification.from_pretrained technique to load the mannequin -
vocab.txt: vocab information utilized by the tokenizer
TorchServe
TorchServe wraps PyTorch fashions right into a set of REST APIs served by a HTTP net server. Including the torchserve command to the CMD or ENTRYPOINT of the custom container launches this server. On this article we’ll solely discover prediction and well being verify APIs. The Explainable AI API for PyTorch fashions on Vertex endpoints is presently supported just for tabular knowledge.
TorchServe Config (–ts–configparameter): TorchServe config permits you to customise the inference handle and administration ports. We additionally configure service_envelop subject to json to point the anticipated enter format for TorchServe. Confer with TorchServe documentation to configure different parameters. We create a config.properties file and go it as TorchServe config.
-
Mannequin Retailer (–
mannequin–retailerparameter): Mannequin retailer location from the place native or default fashions may be loaded -
Mannequin Archive (–
fashionsparameter): Fashions to be loaded by TorchServe utilizing[model_name=]model_locationformat. Mannequin location is the mannequin archive file within the mannequin retailer.
four. Construct and push the custom container picture
-
Run the next command to construct the container picture based mostly on the
Dockerfileand tag it with a reputation appropriate along with your Container Registry repository:
Earlier than pushing the picture to the Container Registry, you possibly can check the docker picture domestically by sending enter requests to an area TorchServe deployment operating inside docker.
-
To run the container picture as a container domestically, run the next command:
-
To ship the container’s server a well being verify, run the next command:
This request makes use of a check sentence. If profitable, the server returns the prediction within the following format:
-
After the response is verified, it confirms that the custom handler, mannequin packaging and torchserve config are working as anticipated. You may cease the TorchServe native server by stopping the container.
Now push the custom container picture to the Container Registry, which might be deployed to the Vertex Endpoint within the subsequent step.
NOTE: You too can construct and push the custom container picture to the Artifact Registry repository as a substitute of the Container Registry repository.
5. Deploying the serving container to Vertex Endpoint
Now we have packaged the mannequin and constructed the serving container picture. The following step is to deploy it to a Vertex Endpoint. A mannequin have to be deployed to an endpoint earlier than it may be used to serve on-line predictions. Deploying a mannequin associates bodily assets with the mannequin so it will probably serve on-line predictions with low latency. We use Vertex SDK for Python to add the mannequin and deploy it to an endpoint. Following steps are relevant to any mannequin skilled both on Vertex Coaching service or elsewhere comparable to on-prem.
Add mannequin
We add the mannequin artifacts to Vertex AI and create a Mannequin useful resource for the deployment. On this instance the artifact is the serving container picture URI. Discover that the predict and well being routes (necessary routes) and container port(s) are additionally specified at this step.
After the mannequin is uploaded, you possibly can view the mannequin within the Fashions web page on the Google Cloud Console underneath the Vertex AI part.
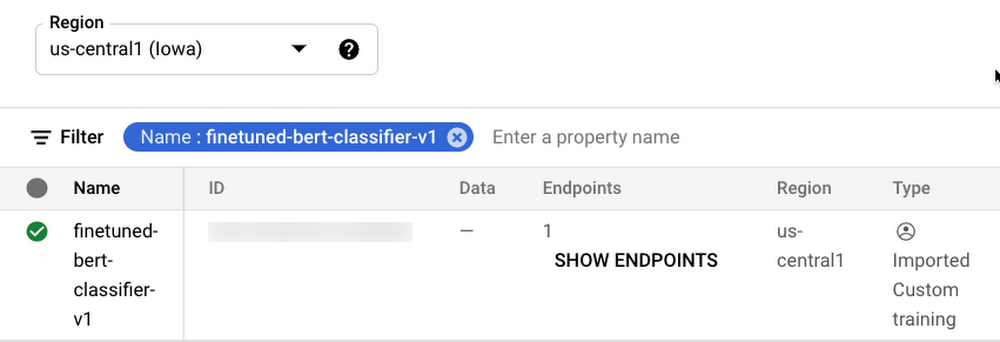
Determine 2. Fashions web page on Google Cloud console underneath the Vertex AI part
Create endpoint
Create a service endpoint to deploy a number of fashions. An endpoint gives a service URL the place the prediction requests are despatched. You may skip this step if you’re deploying the mannequin to an current endpoint.
After the endpoint is created, you possibly can view the endpoint within the Endpoints web page on the Google Cloud Console underneath the Vertex AI part.

Determine three. Endpoints web page on Google Cloud console underneath the Vertex AI part
Deploy the mannequin to endpoint
The ultimate step is deploying the mannequin to an endpoint. The deploy technique gives the interface to specify the endpoint the place the mannequin is deployed and compute parameters together with machine sort, scaling minimal and most reproduction counts, and site visitors break up.
After deploying the mannequin to the endpoint, you possibly can handle and monitor the deployed fashions from the Endpoints web page on the Google Cloud Console underneath the Vertex AI part.

Determine four. Handle and monitor fashions deployed on Endpoint from Google Cloud console underneath the Vertex AI part
Check the deployment
Now that the mannequin is deployed, we will use the endpoint.predict() technique to ship base64 encoded textual content to the prediction request and get the expected sentiment in response.
Alternatively, it’s also possible to name the Vertex Endpoint to make predictions utilizing the gcloud beta ai endpoints predict command. Confer with the Jupyter Pocket book for full code.
Cleansing up the surroundings
After you’re achieved experimenting, you possibly can both cease or delete the Notebooks occasion. Delete the Pocket book occasion to forestall any additional prices. If you wish to save your work, you possibly can select to cease the occasion as a substitute
To wash up all Google Cloud assets created on this submit and the earlier submit, you possibly can delete the person assets created:
-
Coaching Jobs
-
Mannequin
-
Endpoint
-
Cloud Storage Bucket
-
Container Photographs
Comply with the Cleansing Up part within the Jupyter Pocket book to delete the person assets.
What’s subsequent?
Persevering with from the coaching and hyperparameter tuning of the PyTorch based mostly textual content classification mannequin on Vertex AI, we confirmed deployment of the PyTorch mannequin on Vertex Prediction service. We deployed a custom container operating a TorchServe mannequin server on the Vertex Prediction service to serve predictions from the skilled mannequin artifacts. As the following steps, you possibly can work via this instance on Vertex AI or maybe deploy one in all your individual PyTorch fashions.
References
-
Deploying fashions on Vertex Prediction service
-
Customized container necessities for prediction | Vertex AI
-
GitHub repository with code and accompanying pocket book
Within the subsequent article of this collection, we’ll present how one can orchestrate a machine studying workflow utilizing Vertex Pipelines to tie collectively the person steps which we now have seen thus far, i.e. coaching, hyperparameter tuning and deployment of a PyTorch mannequin. This can lay the inspiration for CI/CD (Steady Integration / Steady Supply) for machine studying fashions on the Google Cloud platform.
Keep tuned. Thanks for studying! Have a query or wish to chat? Discover authors right here – Rajesh [Twitter | LinkedIn] and Vaibhav [LinkedIn].
Because of Karl Weinmeister and Jordan Totten for serving to and reviewing the submit.
[ad_2]
Source link